Get A Free Quote

7 Tips for Buying Bicycle End Caps

Bicycle End Caps may be small, but the right choice can help protect exposed handlebar ends and create a neat finish. A loose, cracked, or poorly sized cap can be annoying on every ride. It may also leave the bar opening exposed to dirt and moisture. The details matter. Check your handlebar’s inner diameter before ordering, since caps are not universally interchangeable. A ruler can help, but measure carefully and confirm the product’s stated fit range. A few millimeters can change the result.

This guide covers seven practical points to consider when buying Bicycle End Caps, from fit and material to installation and value. Look for durable construction, a secure fit, and edges that sit evenly against the bar. Consider how the caps will be installed, too; some designs press in, while others use an expanding mechanism. If possible, compare the product details with your handlebar specifications rather than relying on appearance alone. A polished photo can hide a mismatch. Even experienced riders may overlook that. Think about your riding conditions and how often you handle or transport your bicycle. No single design suits every setup, and low cost does not always mean poor quality. Still, vague sizing information deserves a second look. With a little checking, you can choose caps that fit cleanly and hold up to regular use.
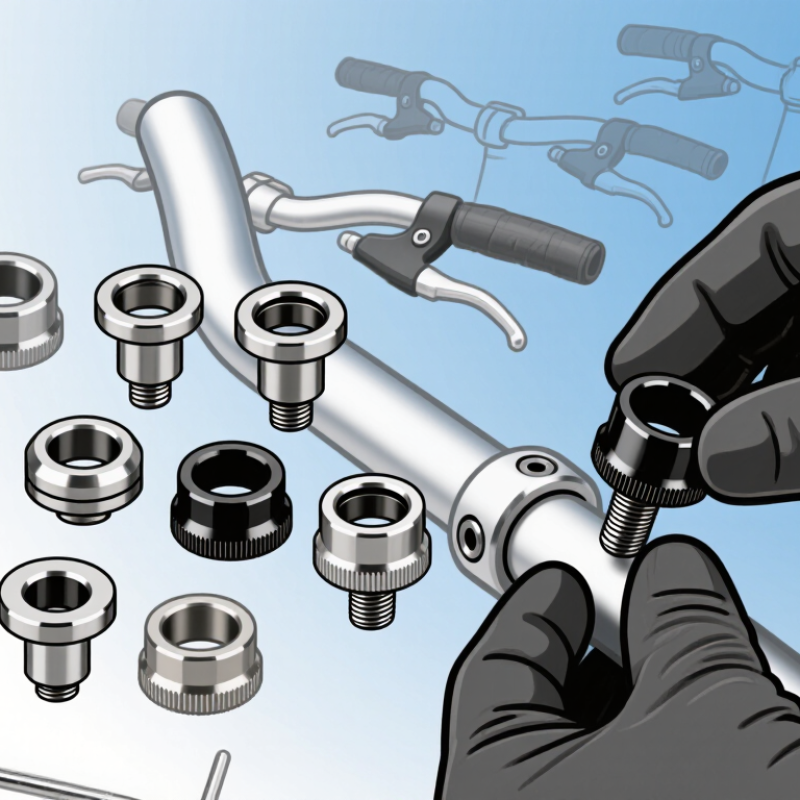
7 Tips for Buying Bicycle End Caps

What Bicycle End Caps Do and Where They Are Used

A bicycle end cap closes an exposed opening or finishes the end of a component. The most visible example is the plug fitted into each handlebar end. It keeps dirt and water away from the hollow bar, and provides a smoother edge if a rider’s hand slips. Small detail. Cable ends use different caps: crimped metal tips help keep cut strands from unraveling, while housing ferrules support cable housing at its ends. Some hubs also use Axle End Caps, sized to fit a particular axle and frame setup. The term can be confusing; shops do not always use it consistently.

Placement matters when choosing a replacement. Handlebar plugs must fit the bar’s inside diameter and stay secure when pushed or tapped into place. Cable caps should match the cable or housing, without crushing it. Hub end caps need to match the hub and axle standard; appearance alone is not enough. PeopleForBikes’ 2024 U.S. Bicycling Participation Report estimated that 112 million Americans rode a bicycle in 2023. That broad use makes routine fit checks worthwhile, even for tiny parts. Check the fit. A loose plug can fall out, and a poorly crimped cable tip may snag during adjustment. I would measure twice; these parts look interchangeable until they are not.

7 Tips for Buying Bicycle End Caps — What They Do and Where They’re Used

Handlebar end plugs cover open bar ends, helping protect riders and keep dirt and moisture out. Choose a plug that fits the handlebar’s measured inside diameter.

Approximate ranges commonly encountered; handlebar dimensions vary by model and are not universal standards. Cable end caps are separate fittings used to finish exposed cable housing.

Identify the End Cap Type and Size Your Bicycle Requires

Before buying a bicycle end cap, identify where it fits. The term can describe a handlebar plug, a hub axle cap, or a cover for another component. These parts are not interchangeable. Check the bicycle’s manual or inspect the existing cap and its mounting point. Note the component type, attachment method, and any visible markings.

Tip: Measure the opening, not just the old cap. A handlebar plug must match the bar’s inner diameter, while an axle cap may depend on axle diameter, thread, and hub design. Use calipers when available. A ruler can help, but small differences are easy to miss. It is tempting to trust a quick measurement; that is where sizing can go wrong. Check whether the opening is round and unobstructed, too.

Compare your measurements with the component maker’s fit information, without assuming one size fits every bicycle. If replacing a hub cap, confirm the hub model and axle configuration; left and right parts may differ. For handlebar plugs, a snug fit should stay in place without forcing the plug into the bar. Keep the old part for comparison. If details remain unclear, ask a qualified bicycle mechanic to verify the fit before ordering.

Compare Materials, Durability, and Weather Resistance

When buying bicycle end caps, compare the material with your riding conditions. Plastic caps are light and often affordable, but thin ones may split after repeated knocks. Aluminum feels sturdier and resists everyday scuffs, though its finish can scratch or corrode if damaged and left wet. Rubber or flexible polymer caps can absorb small impacts and grip the bar opening well. Feel the edges, too; rough seams can make installation awkward.

Fit matters. Measure your handlebar’s inner diameter, since a cap that is too loose may work out on rough roads. A snug fit should hold without forcing the plug so hard that it deforms. Check whether the design uses expanding inserts or a simple push fit, and follow its installation guidance. Small parts count.

Weather resistance is more than a sealed-looking surface. If you ride in rain, inspect how the material and finish handle moisture, sunlight, and temperature changes. Metal can be durable, but exposed or poorly protected surfaces may show corrosion over time. Plastic avoids rust, yet some types become brittle after prolonged UV exposure. No material is immune to neglect. Rinse off grit and dry the bars when practical. It is tempting to choose the toughest-looking cap, but fit and maintenance matter just as much. A slightly imperfect finish may be acceptable; a loose cap is not.

Check Compatibility With Cables, Handlebars, and Components

Before buying end caps, identify what they must close: a cable housing, a handlebar end, or a component port. These parts can look alike but fit differently. Common handlebar grip sections measure about 22.2 mm across; the familiar 31.8 mm figure usually refers to the stem clamp area, not the bar opening. Measure the inside diameter, not the outer surface. A ruler can help, but calipers are more reliable.

Cable fittings need equal care. Brake and shift housings often use different diameters, and a ferrule that is too wide may not seat in a barrel adjuster. Measure the housing and check the component maker’s technical drawing before ordering. ISO 4210-2:2023 sets safety requirements for bicycle components, including handlebar assemblies; it does not make end-cap sizes universal. Match the cap to the actual part. Nearly right is still wrong.

Check material and clearance, too. A metal cap may foul a lever or frame when the bars turn; a plastic one may split if forced into a tight opening. Confirm that the cap stays secure without crushing the cable housing. Leave room for adjustment. A tiny mismatch can cause rattling or poor cable movement, and the packaging may not make that obvious. Measure twice; labels can mislead.

7 Tips for Buying Bicycle End Caps - Check Compatibility With Cables, Handlebars, and Components
Tip What to Check Useful Compatibility Guide Buying or Fitting Advice
1. Identify the type of end cap Determine whether you need a cable end cap, a housing ferrule, or a handlebar end plug. Cable end caps cover exposed inner-wire ends. Housing ferrules finish the ends of cable housing. Handlebar plugs close the open ends of handlebars. These parts serve different purposes and are not interchangeable. Check the part location before ordering.
2. Match the cap to the cable Check the inner cable’s diameter and whether it is used for braking or shifting. Common bicycle inner cables are approximately 1.1–1.2 mm for shifting and approximately 1.5–1.6 mm for braking, though specifications vary. Choose a cap intended for the cable type and diameter. It should slide over the cable end without being excessively loose.
3. Check housing and ferrule fit Measure the cable housing’s outside diameter and confirm whether the component accepts a ferrule. Many shift housings are about 4 mm in outside diameter, while many brake housings are about 5 mm. Some systems use different sizes or housing-end designs. Use the housing maker’s specifications when available. Do not force a ferrule into a frame stop, lever, or adjuster that is designed for a bare housing end.
4. Measure the handlebar opening For a handlebar end plug, check the inside diameter of the bar end, not just its outside diameter. Internal opening size varies with handlebar material, wall thickness, and shape. Many plugs use an expandable or flexible insert to accommodate a range of openings. Compare the measured opening with the plug’s stated fit range. The plug should seat securely without excessive force.
5. Check clearance with nearby components Inspect brake levers, bar-end shifters, handlebar extensions, and any cables routed near the bar end. Plug length and shape can affect clearance, especially where a bar-end shifter or accessory occupies the handlebar opening. Confirm that the plug does not obstruct a control, cable route, or accessory. Follow the component manufacturer’s installation instructions.
6. Choose a suitable material and finish Consider the environment, exposure to moisture, and the material of the handlebar or cable system. Aluminum and brass cable caps are common; plastic or rubber plugs are also used at handlebar ends. Material alone does not determine fit. For wet or frequently washed bicycles, keep cable ends and housing ends clean and properly finished. Avoid sharp burrs that could damage cables or hands.
7. Check installation and quantity Confirm the required installation method and how many caps are needed for the bicycle. Cable end caps are usually crimped onto trimmed inner-wire ends with a suitable cable cutter and crimping tool. Handlebar plugs are generally pressed or expanded into the bar end. Count the cable ends being finished and check whether spare parts are included. After installation, verify that cables move freely and plugs remain secure.

Assess Installation Requirements and Product Quality

Before buying bicycle end caps, confirm how they attach to your wheel or axle. Some use threads; others press into place. Check the axle diameter, thread pitch, and available clearance against the bicycle’s specifications. Measure the old cap if it is intact, but do not assume every side uses the same part. A close fit is not always a correct fit. Forcing a cap can damage threads or seals.

Tip: Compare dimensions, attachment style, and any required tool before ordering. If the fit remains uncertain, ask a qualified bicycle mechanic to check the axle. That small pause can prevent a frustrating installation.

Product quality matters, too. Look for cleanly finished surfaces, even edges, and threads without visible burrs. The cap should seat evenly and stay secure without excessive force. Materials and coatings should suit the riding conditions, especially where moisture or road grit is common. After installation, check for looseness and spin the wheel to listen for rubbing. One detail is easy to miss: a cap may look sound while hiding a poor fit. Recheck it after a short ride, and stop if the wheel develops play.

crossmenu linkedin facebook pinterest youtube rss twitter instagram facebook-blank rss-blank linkedin-blank pinterest youtube twitter instagram